
Before installing overhead garage racks, you should assess your garage’s structural load limits, check ceiling support and materials, and locate secure mounting points like ceiling joists. Clear your workspace of hazards, gather all necessary tools and hardware, and carefully follow installation instructions. Proper load distribution and regular inspections are key to safety and longevity. If you want to guarantee everything’s covered, keep going—this guide will help you master the process.
Key Takeaways
- Assess garage ceiling strength and load capacity to ensure it can support the racks and stored items safely.
- Locate and verify secure mounting points like ceiling joists, avoiding weak spots or obstacles.
- Gather proper tools and hardware, confirming compatibility with your garage’s structure and rack specifications.
- Install racks following manufacturer instructions, securely anchoring to supports and evenly distributing weight.
- Regularly inspect the racks and ceiling for stability, hardware integrity, and signs of stress or damage over time.

Tlence 4 Pack Overhead Garage Storage Hooks, 16.5" Heavy Duty Ceiling Mount Hangers, Double T-Bar Metal Ladder Ceiling Racks, Hanging for Bike, Pipe Lumber, Fishing Rod, Sports Equipment
Value Pack: Included 4 packs of black overhead garage storage hooks, each hook measures approximately 16.5 "x 10.7"…
As an affiliate, we earn on qualifying purchases.
As an affiliate, we earn on qualifying purchases.
Garage Safety Checklist: Assess Structural Load Limits
Before installing overhead garage racks, it’s essential to assess your garage’s structural load limits to guarantee safety. You need to understand how weight distribution affects your ceiling’s ability to support storage. Check your garage’s load capacity to ensure it can handle the combined weight of the racks and stored items. Overloading can lead to structural damage or collapse, posing safety hazards. Measure the weight of items you plan to store and compare it to your ceiling’s maximum load capacity. If your garage’s structure isn’t designed to support heavy loads, consider reinforcement options before installation. Proper assessment helps prevent accidents and guarantees your overhead racks are both secure and durable, providing a safe storage solution without risking structural integrity. Understanding your battery inverter generator’s capacity can help you better plan your storage needs and avoid overloading. Additionally, consulting professional structural assessments can provide added assurance of your garage’s safety before installation. Always ensure your garage’s structural integrity is sufficient to support your planned storage solutions, especially when dealing with heavier items.

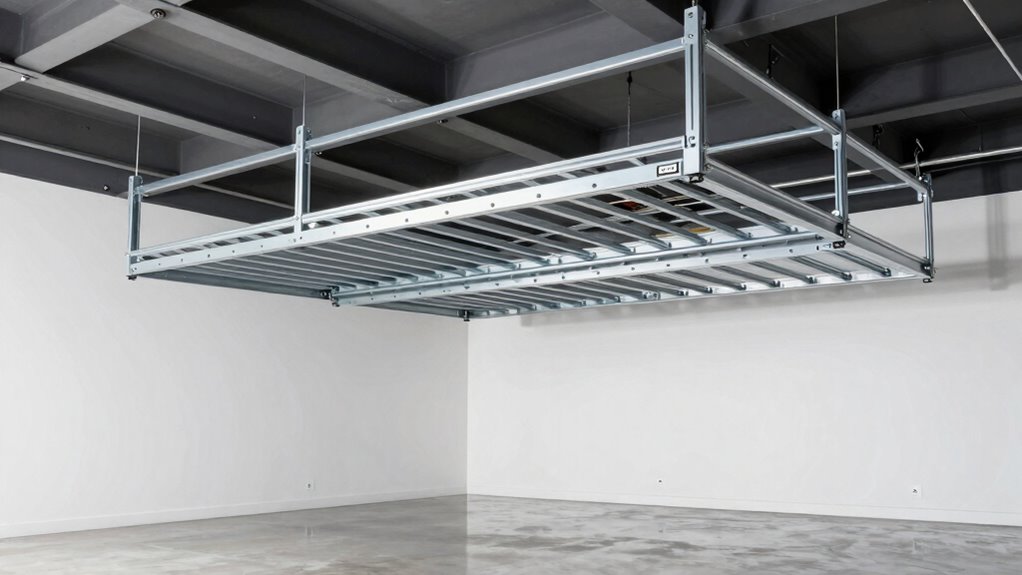
FLEXIMOUNTS 4×8 Overhead Garage Storage Rack, Adjustable Organization System, Heavy-Duty Metal Ceiling Racks, 750lbs Weight Capacity, Black, Classic Series
1200 lbs Tested, 750 lbs Rated: Our overhead garage storage rack undergoes rigorous 1.6 times load testing (1200…
As an affiliate, we earn on qualifying purchases.
As an affiliate, we earn on qualifying purchases.
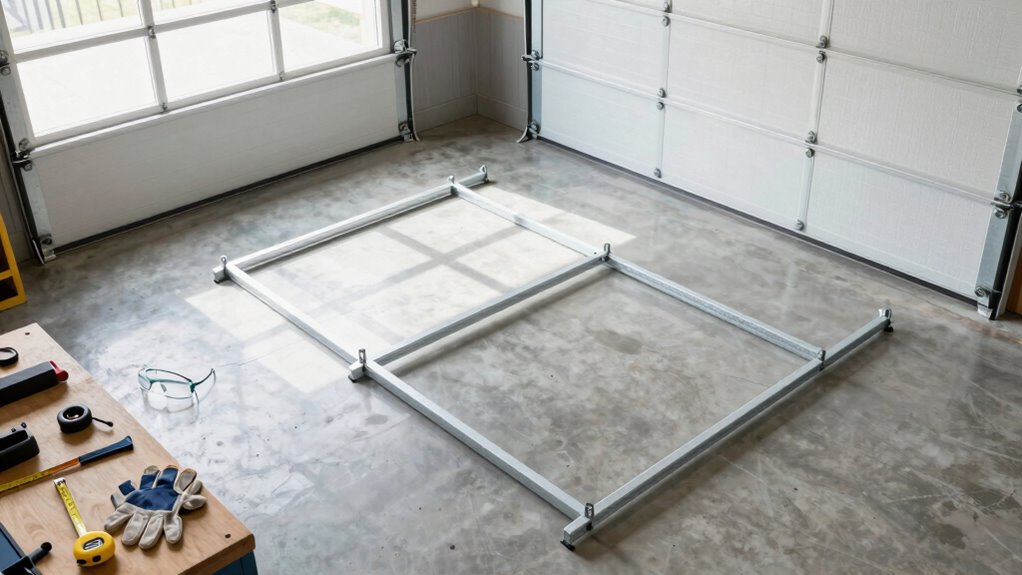
Identify Hidden Hazards and Prepare Your Workspace

Evaluating your garage’s structural load limits is only the first step; you also need to identify any hidden hazards that could interfere with safe installation. Hazard identification involves thoroughly inspecting the area for obstacles like exposed wiring, leaking pipes, or unstable surfaces. Clear the workspace of clutter, tools, and debris to ensure safe movement and prevent accidents. Check for any signs of mold, pests, or sharp objects that could pose health or injury risks. Proper workspace preparation means securing loose items, removing tripping hazards, and ensuring adequate lighting. Additionally, understanding your garage’s structural integrity helps prevent unexpected failures during installation. Conducting a hazard assessment prior to installation ensures that all potential risks are addressed. Recognizing potential safety hazards and addressing them proactively can significantly reduce the likelihood of accidents. Taking these steps helps create a safe environment for installing your overhead garage racks. By proactively recognizing hazards, you reduce the risk of accidents and ensure a smoother, safer installation process. Be sure to also consider work area ventilation to prevent fumes or dust buildup during the process. Incorporating appliance safety standards can further enhance the overall safety of your workspace during installation.
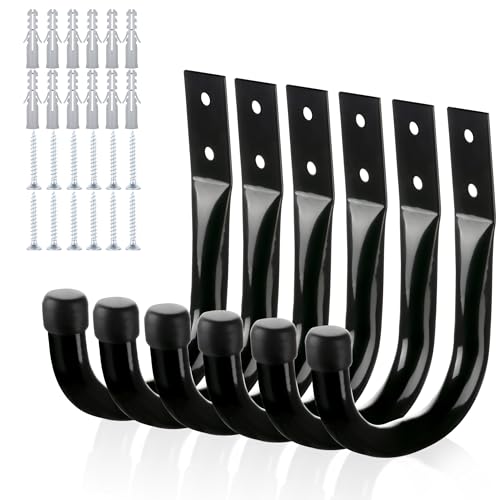
KURUI Metal Wall Hooks for Hanging Heavy Duty, 6Pcs Garage Organization and Storage Hook for Extension Cord Tool Coat Backpack Bag, Large Utility J Hooks, Black Wall Mount Hanges for Outdoor Indoor
EXCELLENT LOAD-BEARING STRENGTH – Our Heavy Duty garage storage hooks are made of thicker carbon steel with a…
As an affiliate, we earn on qualifying purchases.
As an affiliate, we earn on qualifying purchases.
Gather Tools and Hardware You’ll Need

Before starting, make sure you have all the essential tools on hand, like a drill, level, and wrench. Check that your hardware matches the rack’s specifications to guarantee safety and stability. Having everything ready helps your installation go smoothly and securely. Additionally, verify that your solar system components are compatible with your garage rack setup to prevent potential safety hazards. To ensure safe and effective installation, always review DIY safety tips related to your tools and hardware. For optimal results, consider regional flavors and your local climate conditions to choose the best materials and hardware for your environment. It’s also helpful to consult best gear and knife roundups for smart shopping to select durable, high-quality hardware suited for your region.
Essential Tools List
To successfully install overhead garage racks, you’ll need to gather the right tools and hardware. Start with a power drill and various drill bits to make precise holes, especially around garage lighting fixtures and ceiling supports. A level ensures your racks are perfectly straight, while a tape measure helps with accurate placement. A stud finder is indispensable for locating sturdy ceiling joists to support the weight. Keep a wrench or socket set handy for tightening bolts, and have safety gear like gloves and goggles. Don’t forget a ladder to reach high ceilings safely. Before starting, do a thorough garage cleaning to clear space and identify obstructions. Having these tools ready streamlines the process and ensures a safe, secure installation of your overhead garage racks.
Hardware Compatibility Check
Checking hardware compatibility is a crucial step to guarantee your overhead garage racks will fit and function properly. You need to verify that your hardware specifications align with the rack and ceiling structure. You should also consider the load capacity of your hardware to ensure it can support the intended weight safely. It is also helpful to review the manufacturer’s instructions to understand specific requirements and recommendations for installation. Gather the necessary tools and hardware to compare sizes, weight limits, and mounting options. Additionally, understanding the safety and seamanship fundamentals can help you identify potential risks associated with improper hardware use and installation procedures. Recognizing the importance of proper installation techniques can further improve safety and durability of your overhead racks. Ensuring compatibility also involves inspecting the hardware quality to prevent failures over time.
- A measuring tape to check ceiling and hardware dimensions
- A level to ensure proper alignment
- Bolts, anchors, and brackets matching the hardware specifications
- A drill and screwdriver for fitting hardware securely
Ensuring compatibility before installation minimizes risks and saves time. Confirm all hardware matches the manufacturer’s recommendations and fits your garage’s setup for a safe, secure, and durable overhead rack system.

DIYSELF Magnetic Pickup Tool, Telescoping Magnet Stick, LED Flashlight, Flexible Magnetic Pickup Tool, Extendable Magnet Tool for Mechanics, Auto, Inspection Mirror, Cool Gadgets for Men, Gift for Him
Telescoping Magnet Stick Set: Equipped with a 15 lb strong magnet tool for heavier bolts and tools, plus…
As an affiliate, we earn on qualifying purchases.
As an affiliate, we earn on qualifying purchases.
Check Your Ceiling Material and Find Secure Mounting Points
Before installing your garage rack, you need to check your ceiling material to guarantee it’s strong enough to support the weight. Look for solid areas where you can securely mount the brackets, avoiding spots that are weak or hollow. Finding the right mounting points is vital for a safe and sturdy setup. Additionally, ensuring your ceiling has the proper support structure can prevent potential failure or damage over time. Evaluating the ceiling strength and integrity is essential to ensure a secure installation. Conducting a structural assessment can help identify any hidden issues that might compromise safety, such as drill points or existing damage that could affect attachment stability. Knowing your load capacity can further ensure your garage rack remains safe under heavy use.
Assess Ceiling Material Strength
Your first step is to evaluate the strength of your ceiling material to guarantee it can support the weight of your garage rack. Conducting a thorough strength assessment helps prevent accidents or damage. Look for signs of weakness, such as sagging or cracks. Identify the type of ceiling material, whether it’s drywall, wood, or concrete, as each requires different mounting strategies. Check for existing joists, beams, or support structures that can bear weight. Consider the age and condition of your ceiling, since worn or damaged surfaces might not hold securely. Remember, a solid ceiling material is essential for safe installation. Proper strength assessment ensures you find secure mounting points and avoid installing into weak spots. Material integrity is crucial for safety and stability. Conducting a structural analysis can further confirm your ceiling’s capacity to support additional weight. Ensuring that you understand the ceiling’s support system is vital for a secure and safe installation. Safety starts with knowing your ceiling’s capacity.
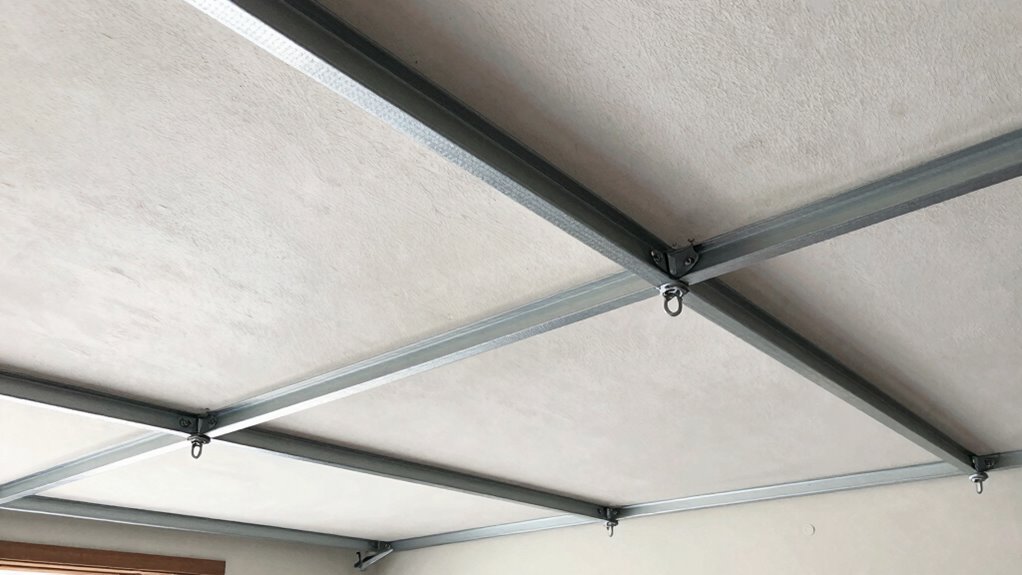
Locate Secure Mounting Points
To guarantee your garage rack is securely mounted, you need to identify strong attachment points in your ceiling. Use a stud finder to locate ceiling joists, which provide solid support for your rack. Move the stud finder across the ceiling until it detects the edges of a joist, then mark these spots. Ceiling joists are typically spaced 16 to 24 inches apart, so double-check your measurements. Avoid mounting directly into drywall or ceiling panels alone, as they lack the strength to hold heavy loads. Once you’ve pinpointed the ceiling joists, ensure they’re in good condition and free of damage. Attaching your rack to these secure mounting points guarantees stability and safety, preventing potential accidents or damage later on.
Install the Rack Safely and Distribute the Load Properly

Installing your garage rack safely starts with carefully following the manufacturer’s instructions and securing it to wall studs or appropriate anchors. Proper installation ensures the rack can handle your intended load without risk of failure. Once mounted, focus on distributing the weight evenly across the rack, adhering to safety guidelines. Overloading one side can compromise stability and safety. To help visualize, consider these points:
- Mount the rack at a height that prevents obstruction and allows easy access
- Use appropriate anchors rated for the weight you plan to store
- Distribute heavier items towards the center or closer to the wall for balanced weight distribution
- Regularly check for signs of stress or loosened hardware
Following these steps guarantees a safer setup and helps maintain the integrity of your overhead garage rack.
Inspect Your Installation and Plan for Safe Load Use
Before loading your overhead garage rack regularly, it’s vital to inspect the installation for stability and security. Check that the rack is firmly anchored and that all brackets and supports are secure. Proper weight distribution is essential; avoid concentrating heavy items in one spot, which can compromise the rack’s integrity. Plan your loads by prioritizing lighter items on the top and heavier ones closer to the ceiling, ensuring even weight distribution. Additionally, look for safety signage or labels that indicate maximum load capacities and safe use instructions. Adhering to these guidelines prevents accidents and prolongs the rack’s lifespan. Regularly inspecting your installation and planning for safe load use keeps your garage organized, safe, and functional.
Frequently Asked Questions
What Are Signs of Ceiling Structural Damage Before Installation?
You should look for signs of ceiling structural damage, like sagging or uneven surfaces that suggest compromised ceiling stability. Check for drywall cracks, especially near the ceiling corners or where drywall meets joists, as they can indicate shifting or weakness. Also, tap gently to listen for hollow spots that signal underlying damage. Address any of these issues before installing overhead garage racks to guarantee safety and prevent potential collapses.
How Do I Determine the Maximum Weight Capacity of My Garage Ceiling?
To determine your garage ceiling’s maximum weight capacity, start by checking the building plans or manufacturer specifications. If unavailable, assess the ceiling’s strength by inspecting joists and beams for signs of damage or sagging. Use a load calculator or consult a structural engineer for an accurate estimate. Remember, knowing your ceiling’s weight capacity is essential for safe installation of overhead racks, preventing potential accidents or damage.
Are There Specific Safety Precautions for Installing Racks in Older Garages?
You should reinforce your garage ceiling and check electrical wiring considerations before installing racks in an older garage. Investigate whether the ceiling can support added weight by inspecting for cracks or sagging, and consult a professional if needed. Make certain electrical wiring is not in the way or at risk of damage. Taking these precautions helps prevent accidents and ensures a safe, secure installation that lasts.
Can I Install Overhead Racks Alone or Should I Seek Professional Help?
You can attempt DIY installation of overhead garage racks if you’re comfortable with tools and have some experience. However, for safety and proper support, seeking professional assistance is advised, especially in older garages or if your ceiling structure isn’t clear. Professionals ensure the racks are securely installed, reducing risks of accidents or damage. When in doubt, investing in expert help guarantees safety and long-lasting results.
How Often Should I Inspect the Rack After Installation for Safety?
Think of your overhead rack as a trusted ship sailing your garage’s waters. You should perform safety checks and inspections every six months to guarantee stability and security. Regular inspection frequency helps catch potential issues early, preventing accidents or damage. Keep an eye on bolts, brackets, and mounting points, and tighten anything loose. Consistent safety checks are your best safeguard to maintain a secure, reliable storage system over time.
Conclusion
Before you hang your overhead garage rack, have you double-checked every step to guarantee safety? Visualize your garage with the rack securely in place, holding all your stored items without worry. Taking these precautions isn’t just about compliance—it’s about protecting yourself and your space. When you follow this checklist, you’re building a safer, more organized garage. So why leave safety to chance when a little prep can make all the difference?